
Are you tired of dealing with drafty garage doors that let in the elements and drive up your energy bills? If so, you’re not alone. Protecting your garage from the weather is essential, and a reliable garage door weather seal is the key to achieving a snug, weatherproof fit. In this comprehensive guide, we’ll explore the different types of weather seals, how to select the right product, and step-by-step instructions for proper installation. By the end, you’ll have the knowledge to seal gaps and ensure your garage door is weatherproofed effectively.
Key Takeaways
- Weatherproofing your garage door is crucial for energy efficiency and protecting your property from the elements.
- There are several types of weather seals, including silicone, foam, and EPDM rubber, each with their own advantages.
- Proper installation is key to ensuring an effective seal and preventing air leaks.
- Regular maintenance and replacement of weather seals can help extend their lifespan and keep your garage door functioning at its best.
- Investing in weatherproofing can lead to significant energy savings and protect your garage from water damage, pests, and other external threats.
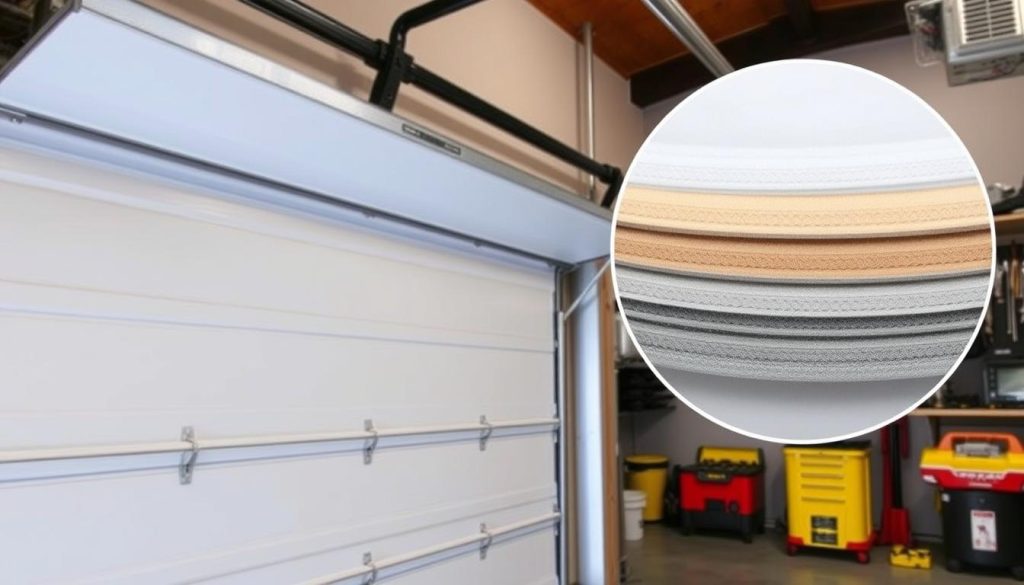
Introduction to Weather Sealing Garage Doors
Weatherproofing your garage door is crucial to preventing drafts, dust, and moisture from entering your home. A well-sealed garage door not only improves energy efficiency but also enhances the overall comfort and security of your living space. Weather sealing your garage door provides numerous benefits, including improved insulation, reduced energy costs, and protection from the elements. It can also help extend the lifespan of your garage door by preventing damage from harsh weather conditions.
The Importance of Weatherproofing
Proper weatherproofing of your garage door is essential for maintaining a comfortable and energy-efficient home. Drafts and air leaks can lead to increased utility bills, while dust and moisture can cause damage to the door and surrounding areas. By implementing effective weather sealing, you can create a barrier against the elements, ensuring your garage remains a secure and climate-controlled space.
Benefits of Weather Sealing Your Garage Door
- Improved insulation and energy efficiency, leading to lower heating and cooling costs
- Protection from dust, debris, and moisture, which can cause damage to the door and surrounding areas
- Enhanced home security by preventing unwanted access through gaps and cracks
- Increased lifespan of the garage door by shielding it from the elements
- Improved overall comfort and climate control within the garage and the connected living spaces
| Benefit | Impact |
|---|---|
| Energy Efficiency | Reduced heating and cooling costs |
| Dust and Moisture Protection | Safeguarded door and surrounding areas |
| Home Security | Prevented unwanted access |
| Lifespan Extension | Shielded from weather-related damage |
| Improved Comfort | Climate-controlled garage and living spaces |
By understanding the importance and benefits of weather sealing your garage door, you can take the necessary steps to ensure your home is well-protected and energy-efficient.
Types of Weather Seals for Garage Doors
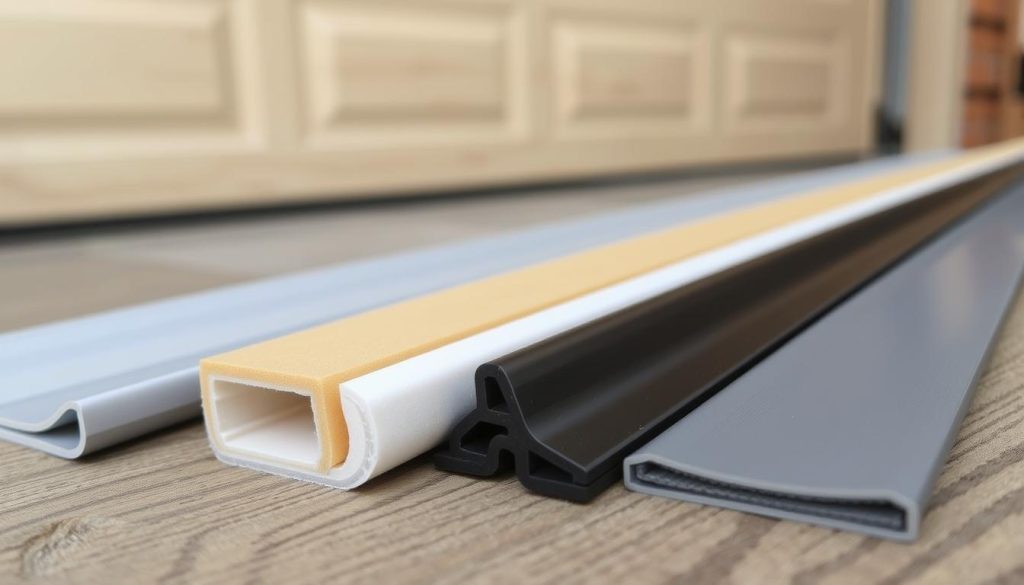
When it comes to weatherproofing your garage door, there are several types of weather seals to choose from, each offering unique benefits. Let’s explore the key features and advantages of the most popular options.
Silicone Weather Seals
Silicone weather seals are a premium choice for garage door weatherproofing. These seals offer a lifetime guarantee and can effectively seal gaps up to 1/4 inch. They are self-adhesive and come in dual strips that need to be separated before use, making installation a breeze.
Foam Weather Seals
Foam weather seals are a cost-effective solution for weatherproofing your garage door. They are self-adhesive and available in multiple sizes to seal small to extra-large gaps. Foam seals provide a reliable barrier against the elements, ensuring your garage stays dry and draft-free.
EPDM Rubber Weather Seals
EPDM rubber weather seals are a durable option for garage door weatherproofing. These seals are self-adhesive, come with a 10-year warranty, and are resistant to freezing and cracking. EPDM rubber seals work best on medium to extra-large gaps, making them a versatile choice for various garage door sizes.
| Seal Type | Gap Size | Warranty | Key Features |
|---|---|---|---|
| Silicone | Up to 1/4 inch | Lifetime | Premium choice, self-adhesive, dual strips |
| Foam | Small to extra-large | N/A | Cost-effective, self-adhesive, multiple sizes |
| EPDM Rubber | Medium to extra-large | 10 years | Durable, self-adhesive, resistant to freezing and cracking |
Each type of weather seal has its own unique features and benefits, making it important to choose the right one for your garage door based on the size of the gaps you need to seal and your budget. By selecting the appropriate weather seal, you can effectively weatherproof your garage and enjoy a more comfortable, energy-efficient space.
Garage door weather seal: Selecting the Right Product
When it comes to weatherproofing your garage door, selecting the appropriate weather seals is crucial. The size of the gaps, the climate in your area, and the level of traffic your door experiences are all important factors to consider. Additionally, factors such as durability, ease of installation, and cost should be taken into account.
Factors to Consider When Choosing Weather Seals
To ensure you select the right weather seals for your garage door, consider the following factors:
- Gap Size: Measure the gaps around your garage door to determine the appropriate seal size. Seals come in various widths and thicknesses to accommodate different gap sizes.
- Climate: The weather conditions in your region will dictate the type of weather seal needed. Harsh winters or hot, humid summers may require more durable seals that can withstand extreme temperatures and moisture.
- Traffic Level: If your garage door experiences high traffic, such as frequent opening and closing, you’ll need weather seals that can withstand the wear and tear without compromising their sealing ability.
- Durability: Look for weather seals made from materials like silicone, EPDM rubber, or vinyl, which are known for their longevity and ability to maintain a tight seal over time.
- Ease of Installation: Consider weather seals that are simple to install, as this can save you time and effort during the installation process.
- Cost: Weigh the initial cost of the weather seals against the long-term benefits of improved energy efficiency and reduced utility bills.
By taking these factors into account, you can select the appropriate weather seals for your garage door and enjoy the benefits of a well-sealed and energy-efficient space.
Step-by-Step Guide to Installing Weather Seals
Properly installing weather seals on your garage door is crucial for maintaining a tight and energy-efficient seal. Follow these step-by-step instructions to ensure a successful installation:
Preparing the Garage Door for Installation
Before installing the weather seals, it’s important to prepare the garage door surface. Ensure the garage door surface is clean, dry, and free of any debris or old sealant. This will allow the new seals to adhere properly and create a tight, continuous seal.
Measuring and Cutting the Weather Seals
Measure the perimeter of your garage door to determine the exact length of weather seals needed. Cut the seals to size, ensuring a continuous, gap-free fit along the top and sides of the door. This will help prevent air and water leaks.
Applying the Weather Seals
Peel off the adhesive backing and carefully apply the weather seals, starting at the top corner and pressing firmly as you work your way down. Ensure the seals are properly aligned and tightly sealed against the door frame. This will create a seamless barrier against the elements.
By following these steps, you can effectively install weather seals on your garage door, improving its energy efficiency and protecting your home from the elements.
“Properly installed weather seals can significantly reduce energy costs and improve the overall comfort of your home.”
Maintaining and Replacing Garage Door Weather Seals
Keeping your garage door weather seals in top condition is crucial for maintaining optimal performance and energy efficiency. Regularly inspect your garage door weather seals for signs of wear, such as cracks, tears, or compression. Replace the seals as needed to ensure your garage door continues to function effectively and provide the protection your home deserves.
Pre-cut weather strips for garage doors commonly range from 7 to 9 feet long. Cutting side pieces of weather stripping about 1/4-inch shorter than garage height is advisable to prevent water collection and potential rot. By taking the time to properly maintain and replace your weather seals, you can help extend the lifespan of your garage door and keep your home comfortable year-round.
When to Replace Garage Door Weather Seals
- Visible cracks or tears in the weather seals
- Compression or flattening of the seals, reducing their effectiveness
- Difficulty opening and closing the garage door due to stuck or hardened seals
- Drafts, moisture, or pests entering the garage through gaps in the seals
If you notice any of these signs, it’s time to replace your garage door weather seals. Proper sealing can help reduce energy costs and improve the overall performance of your garage door.
Cornwell Door Service, a local garage door specialist operating since 1972, recommends regular inspection and timely replacement of weather seals to ensure your garage door remains in top condition. By taking proactive steps to maintain your weather seals, you can help keep your home comfortable and energy-efficient for years to come.
Top Tips for Effective Weather Sealing
Weatherproofing your garage door is a crucial step in maintaining a comfortable and energy-efficient home. However, it’s important to be aware of common mistakes that can undermine your efforts. By avoiding these pitfalls, you can ensure your weather seals provide the ultimate protection against the elements.
Common Mistakes to Avoid
One of the most common mistakes homeowners make is not properly measuring or cutting the weather seals. Accurate measurements are essential for a tight, continuous seal along the entire perimeter of your garage door. Failing to do so can result in gaps and drafts, compromising the effectiveness of your weatherproofing efforts.
Another frequent error is neglecting to clean the door surface before installation. Dirt, debris, and old sealants can prevent the new weather seals from adhering properly, leading to a compromised seal and potential air leaks.
Finally, not ensuring a tight, continuous seal along the entire perimeter is a mistake that can have significant consequences. Gaps or breaks in the seal can allow outside air, moisture, and even pests to enter your garage, undermining the benefits of your weatherproofing investment.
To avoid these common pitfalls and achieve maximum effectiveness, here are some top tips for successful weather sealing:
- Carefully measure the dimensions of your garage door and cut the weather seals to fit precisely.
- Thoroughly clean the door surface, removing any existing sealants or debris, to ensure optimal adhesion.
- Meticulously apply the weather seals, ensuring a tight, continuous seal along the entire perimeter.
- Regularly inspect your weather seals and replace them when necessary to maintain their effectiveness.
By following these best practices, you can enjoy the benefits of a well-sealed garage door, including improved energy efficiency, reduced drafts, and enhanced protection against the elements.
Weatherproofing Garage Door Bottom Seals
In addition to sealing the top and sides of your garage door, it’s important to address the bottom seal. Look for a durable door sweep that provides a tight seal against the threshold without impeding the door’s movement. Measure the width of your garage door and select a bottom seal that fits snugly. Attach the seal’s aluminum channels to the door’s bottom edge, then slide the silicone sweep into the channels and adjust the glides for a proper seal.
Choosing the Right Bottom Seal
When selecting a bottom seal for your garage door, consider the height of your threshold. There are several options available, ranging from 1/2″ to 2″ in height. Choosing the right height is crucial to ensure an effective seal and prevent weather elements from entering your garage.
| Seal Height | Price Range |
|---|---|
| 1/2″ High | $41.91 – $72.32 |
| 3/4″ High | $72.32 – $94.47 |
| 1″ High | $94.47 – $120.01 |
| 1 1/4″ High | $120.01 – $167.23 |
| 1 1/2″ High | $167.23 – $240.88 |
| 2″ High | $240.88 and up |
For commercial doors, aluminum thresholds can withstand heavier loads, up to 50 tons, while residential garages typically use durable and flexible thermoplastic materials.
Installing a Bottom Seal on Your Garage Door
The process of installing a bottom seal is relatively straightforward. First, measure the width of your garage door and select a seal that fits snugly. Attach the aluminum channels of the seal to the door’s bottom edge, then slide the silicone sweep into the channels and adjust the glides for a proper seal. This simple step can significantly improve the weatherproofing of your garage, keeping the elements out and enhancing your home’s energy efficiency.
Maintaining and replacing your garage door’s weatherstripping, including the bottom seal, is crucial. Weatherstripping typically lasts two to three years, so it’s recommended to check it annually and replace it as needed. By keeping your garage door seals in good condition, you can ensure your home remains comfortable and protected from the outdoor elements.
If you need assistance with weatherproofing your garage door, consider contacting a professional service like AAA Garage Door, which has been serving homeowners since 1994. Their experienced team can help you choose the right bottom seal and ensure a proper installation, providing you with a long-lasting solution for your home’s weatherproofing needs.
Cost and Energy Savings of Weather Sealing
When it comes to weatherproofing your garage door, the cost can vary depending on several factors. The size of your door, the type of weather seals you choose, and whether you opt for a DIY installation or hire a professional all play a role in determining the overall expense.
However, the investment in weather sealing is typically well worth it, as it can lead to significant energy savings in the long run. Weather stripping is a cost-effective energy-saving strategy that can lower heating and cooling costs throughout the year by preventing air leaks and improving insulation.
Estimating the Cost of Weather Sealing Your Garage Door
The cost of weather sealing your garage door can range from as little as $20 for a DIY project using basic weather stripping materials to several hundred dollars for a professional installation with high-quality seals. Factors that can influence the cost include:
- The size and type of your garage door
- The material and quality of the weather seals
- Whether you choose to install the seals yourself or hire a professional
According to the Department of Energy, properly weatherstripping exterior doors, windows, and doors leading to uninsulated areas can help reduce energy loss and maintain a comfortable living environment. Similarly, weather-sealing your garage door can improve energy efficiency and lead to savings on your energy bills.
| Weatherstripping Material | Average Cost per Linear Foot |
|---|---|
| Vinyl | $0.50 – $2.00 |
| Rubber | $1.00 – $3.00 |
| EPDM Rubber | $2.00 – $4.00 |
| Foam Tape | $0.25 – $1.50 |
While the initial cost of weather sealing may seem like an investment, the long-term energy savings and improved home comfort can make it a worthwhile and cost-effective solution for many homeowners.
Professional vs. DIY Weather Sealing
While weather sealing your garage door can be a DIY project, there may be instances where hiring a professional is the better choice. This includes situations where the door is in poor condition, the gaps are unusually large, or you lack the necessary tools and experience.
When to Consider Hiring a Professional
Here are some factors to consider when deciding between a DIY or professional approach to weather sealing your garage door:
- Condition of the Garage Door – If your garage door is in poor shape, with significant wear and tear, a professional may be better equipped to assess the extent of the problem and recommend the appropriate weatherproofing solution.
- Size of the Gaps – Larger-than-average gaps around the door may require specialized tools and techniques that a DIYer may not have access to. A professional can ensure a proper, long-lasting seal.
- Lack of Experience – If you’re not confident in your ability to measure, cut, and install weather seals correctly, hiring a professional can give you peace of mind and a guaranteed quality installation.
The average cost of a professional garage door weather sealing service is between $150 and $300, depending on the size of the door and the extent of the work required. This investment can pay off in the long run through improved energy efficiency and a properly functioning garage door.
| Scenario | DIY | Professional |
|---|---|---|
| Garage door in good condition | ✓ | – |
| Gaps are within standard size | ✓ | – |
| Homeowner has necessary tools and experience | ✓ | – |
| Garage door in poor condition | – | ✓ |
| Gaps are unusually large | – | ✓ |
| Homeowner lacks necessary tools and experience | – | ✓ |
By considering these factors, you can make an informed decision on whether a DIY or professional approach is best for weatherproofing your garage door.
Troubleshooting Common Weather Sealing Issues
If you encounter issues with your newly installed weather seals, such as gaps, leaks, or difficulty opening and closing the door, don’t despair. Troubleshooting and making the necessary adjustments can help restore your garage door’s weatherproofing and functionality.
Garage door seals are typically made from rubber or vinyl, which can degrade over time due to exposure to harsh weather conditions like sun, rain, and fluctuating temperatures. Misaligned garage doors can also cause uneven wear on seals, leading to gaps where the door doesn’t meet the floor or frame.
When replacing worn-out seals, it’s essential to measure the existing seal’s length and width to ensure the correct size is purchased. In regions with harsh winters, selecting seals designed to withstand cold temperatures is crucial for optimal performance.
Sometimes, the wrong type of seal material can result in premature wear and tear, particularly in extreme temperatures. If you’re still experiencing issues, it’s worth considering hiring a professional to ensure your garage door is properly weatherproofed.
Common Troubleshooting Steps
- Inspect the seals for any gaps, cracks, or signs of wear and tear.
- Measure the existing seals to confirm you have the right replacement size.
- Check the alignment of the garage door and make any necessary adjustments.
- Ensure the seals are properly secured and not loose or pulled away from the door.
- In cold climates, consider upgrading to seals designed for extreme temperatures.
- If the issue persists, consult a professional for further troubleshooting and repair.
By taking the time to troubleshoot and address any issues with your garage door weather seals, you can help maintain a tight seal, prevent water leaks, and ensure smooth operation of your garage door year-round.
“Proper weatherproofing is essential for maintaining the integrity and energy efficiency of your garage door. Don’t hesitate to address any issues promptly to ensure your home stays comfortable and protected.”
Conclusion
Effectively weatherproofing your garage door is a straightforward and cost-effective way to improve energy efficiency, comfort, and security in your home. By following the guidance provided in this comprehensive guide, you can select the right weather seals, install them properly, and enjoy the benefits of a well-sealed garage door for years to come.
Whether you opt for silicone, foam, or EPDM rubber weather seals, the key is to choose the right products for your garage door and ensure proper installation. By addressing common issues like cracks, gaps, and worn seals, you can prevent the infiltration of dust, debris, and even pests, while also enhancing the overall energy efficiency of your home.
Remember, properly maintained garage door weatherstripping not only contributes to a clean and comfortable garage environment but also helps to regulate temperature, reduce HVAC strain, and ultimately lower your energy costs. By taking the time to inspect, clean, and replace your weatherstripping as needed, you can maximize the benefits of a well-sealed garage door and enjoy a more energy-efficient, secure, and comfortable living space.
FAQ
What are the different types of weather seals for garage doors?
The main types of weather seals for garage doors are silicone, foam, and EPDM (ethylene propylene diene monomer) rubber seals. Each type offers unique benefits in terms of durability, sealing ability, and cost.
How do I choose the right weather seal for my garage door?
When selecting a weather seal, consider the size of the gaps you need to seal, the climate in your area, and the level of traffic your garage door experiences. Also, factor in the seal’s durability, ease of installation, and cost.
How do I properly install weather seals on my garage door?
To install weather seals, start by cleaning the garage door surface to ensure a secure adhesion. Measure the perimeter of your door and cut the seals to size. Peel off the adhesive backing and carefully apply the seals, starting at the top corner and pressing firmly as you work your way down.
How do I maintain and replace my garage door weather seals?
Regularly inspect your weather seals for signs of wear, such as cracks, tears, or compression. Replace the seals as needed to maintain optimal performance and energy efficiency. This will help extend the lifespan of your garage door and ensure a tight, weatherproof seal.
What are some common mistakes to avoid when weather sealing my garage door?
Avoid mistakes like not properly measuring or cutting the weather seals, failing to clean the door surface before installation, and not ensuring a tight, continuous seal along the entire perimeter. These mistakes can lead to gaps and poor sealing performance.
How can I weatherproof the bottom of my garage door?
In addition to sealing the top and sides, it’s important to address the bottom of your garage door. Look for a durable door sweep that provides a tight seal against the threshold without impeding the door’s movement. Measure the width of your door and select a bottom seal that fits snugly.
How much does it cost to weather seal my garage door, and how much can I save on energy costs?
The cost of weather sealing your garage door can vary, but it’s typically a worthwhile investment that can lead to significant energy savings in the long run. By improving your garage door’s insulation, you can expect to see a reduction in your energy bills.
When should I consider hiring a professional to weather seal my garage door?
While weather sealing can be a DIY project, there may be instances where hiring a professional is the better choice. This includes situations where the door is in poor condition, the gaps are unusually large, or you lack the necessary tools and experience.